Let’s create a List with Radio Buttons in SwiftUI for iOS Application. We will use Image with SFSymbol for radio buttons & based on the user selection image will change dynamically. So by use of closure we will get the selected values.
1. Create Radio Button View
We are picking up Button & contents of button taken in HStack. The last element inside is Spacer() for filling up the area.callbackForSelection is used for getting selected values which invokes on button click. And we are passing data through init( function. I kept it simple, but you can use your custom modifiers
struct RadioButtonView: View {

    let currentRadioValue: String
    let callbackForSelection: (String)->()
    let prevselectedValue : String

    init(
        _ id: String,
        callback: @escaping (String)->(),
        selectedID: String
    ) {
        self.currentRadioValue = id
        self.prevselectedValue = selectedID
        self.callbackForSelection = callback
    }

    var body: some View {
        Button(action:{
            self.callbackForSelection(self.currentRadioValue)
        }) {
            HStack(alignment: .center, spacing: 10) {
                Image(systemName: self.prevselectedValue == self.currentRadioValue ? "largecircle.fill.circle" : "circle")
                    .renderingMode(.original)
                    .resizable()
                    .aspectRatio(contentMode: .fit)
                    .frame(width: 18, height: 18)
                Text(currentRadioValue)
                Spacer()
            }
        }
    }
}
2. Create a List for Radio Buttons
Embedding the Radio button is SwiftUI’s List, Here items represents the radio button list & selectedId is current selected Radio button String and callbackForSelection for getting selected radio button value. The example code is below-
struct RadioButtons: View {

    let items : [String]
    let callbackForSelection: (String) -> ()
    @State var selectedId: String = ""

    var body: some View {
        List {
            ForEach(0..<items.count, id: \.self) { index in
                RadioButtonView(self.items[index],
                                callback: self.radioGroupCallback,
                                selectedID: self.selectedId)
            }

        }.listStyle(PlainListStyle())

    }

    func radioGroupCallback(id: String) {
        selectedId = id
        callbackForSelection(id)
    }
}
3. Create Content View
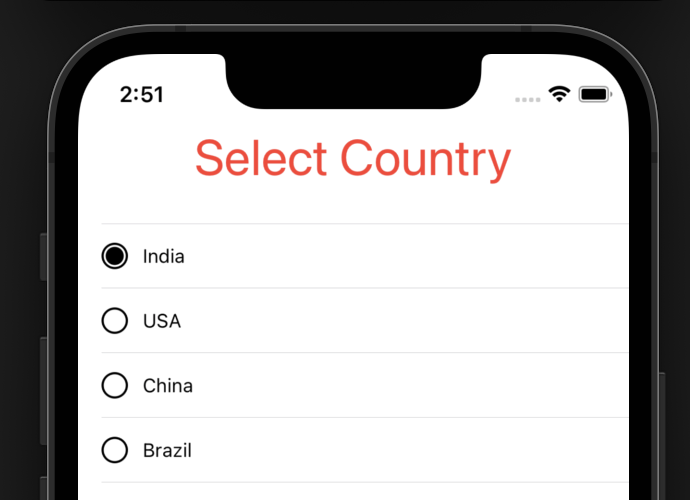
objectsArray is example array which used for radio item listing and you can use default selection by using selectedRadioButton & VStack contains Text with Radio button listing. The example code is below –
struct ContentView: View {

    @State var objectsArray = ["India", "USA", "China","Brazil"]
    @State var selectedRadioButton = "India"

    var body: some View {
        VStack {
            Text("Select Country")
                .font(Font.largeTitle)
                .foregroundColor(.red)
            RadioButtons(items: objectsArray,
                         callbackForSelection:  { selectedVal in
                print("Selected Value  -- : \(selectedVal)")
                selectedRadioButton = selectedVal
            },selectedId: selectedRadioButton)
            Text("Selected --:  \(selectedRadioButton)")
            Spacer()
        }
    }
}
That’s it : )
Source code is here